

Let's jump straight in and get building some threat model diagrams
Contents
Blueprint vs a full threat model
Spotting Unanswered Questionnaires to Improve Accuracy
Tooltip update for unsynced components
Replacing trust zones in the diagram
Replacing components in the diagram
Changing Component Visibility by Business Unit
Including questionnaire answers when duplicating components
Copy the Project link to share with others
Prefer video? Watch a short overview on how to create a diagram from scratch here.
In order to do this, you will need to know a lot about the architecture you are threat modeling. This is so you can easily drag and drop all of the components you will need for your diagram.
Navigate to 'Projects', select the blue ‘New Project’ button. You will need to give your project a name, this can be changed later. Add any relevant tags or description for your application or architecture, and hit 'Create'.

To begin with, until you hit the ‘Update threat model’ button, your diagram will stay as a Blueprint; which is part of our unlimited diagrams offer. You can create as many of these as you wish, and follow all the steps below to add trust zones, components, dataflows and more. All without counting towards your licenses. You can see which of your models are Blueprints by the purple tag they are given in your threat model list.
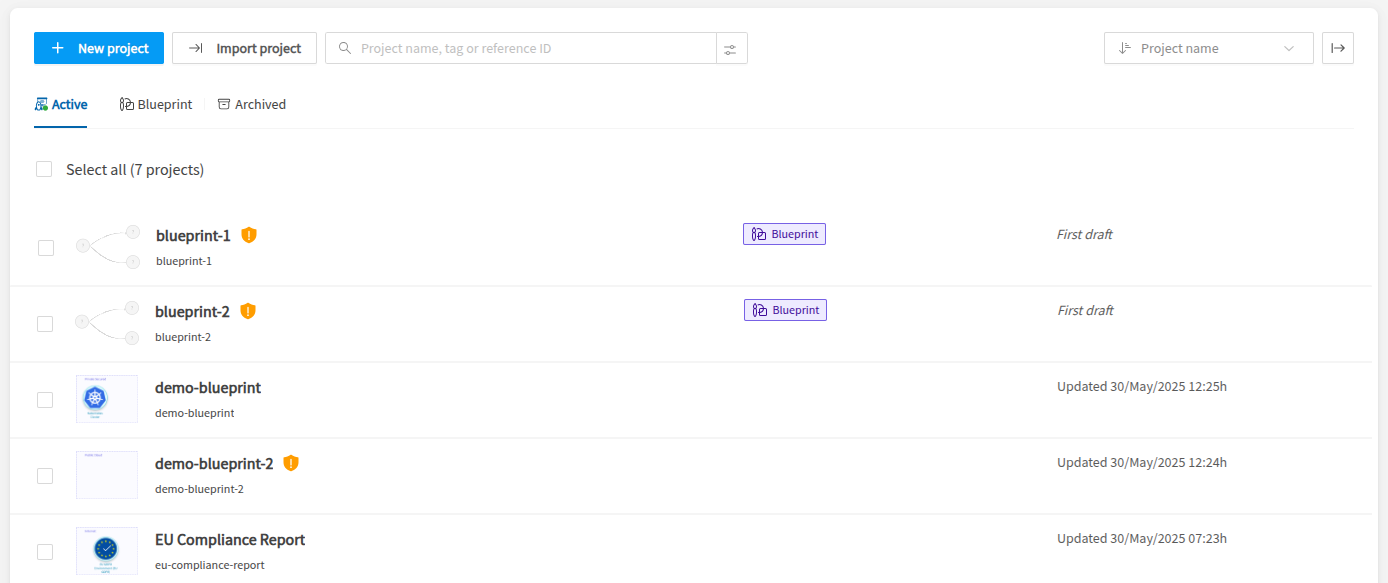
You can also navigate across tabs from Active, to Blueprint, to see them all as a collective. In the same way that you can view your Archived threat models.

Once that button is pressed though, your diagram converts to a full threat model and cannot revert back to a Blueprint. This threat model will then count as normal towards your license agreement.
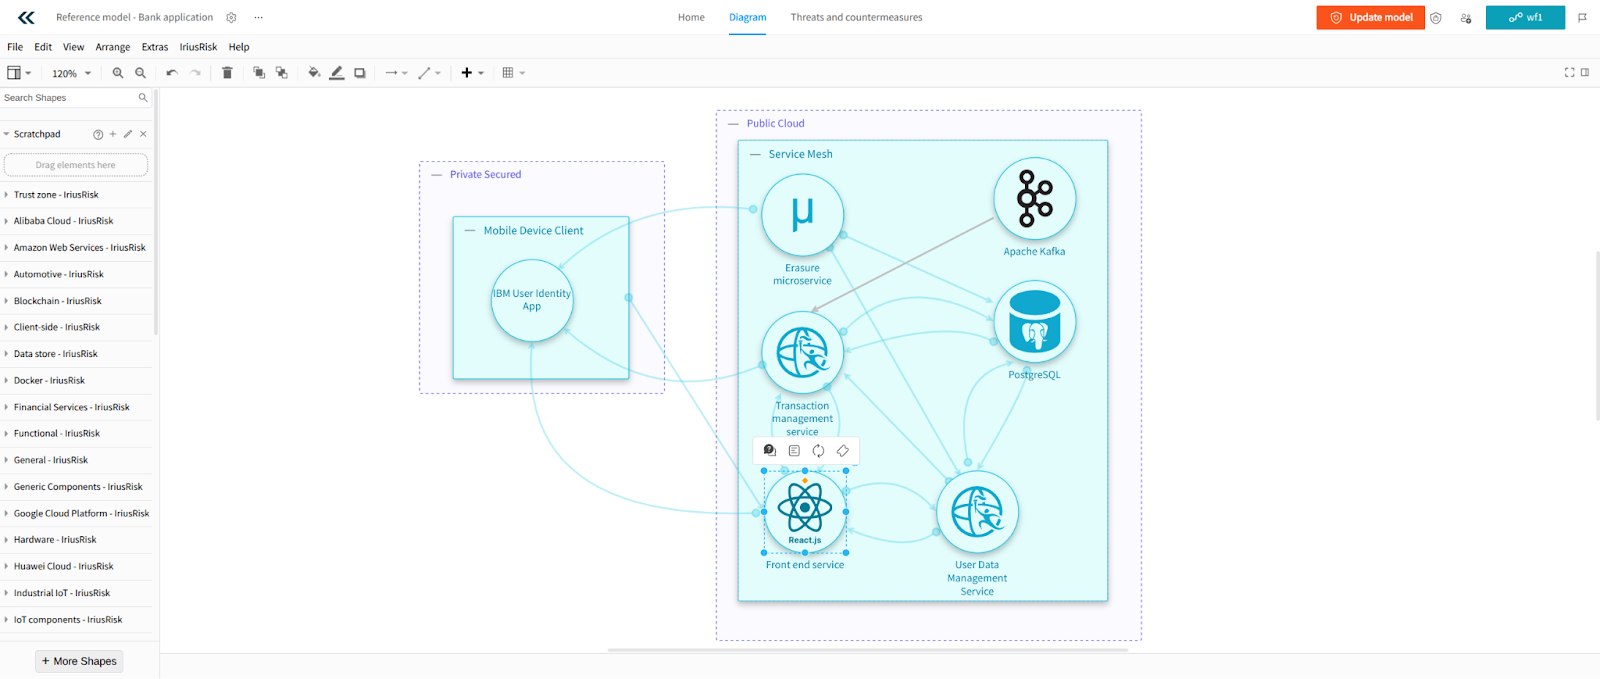
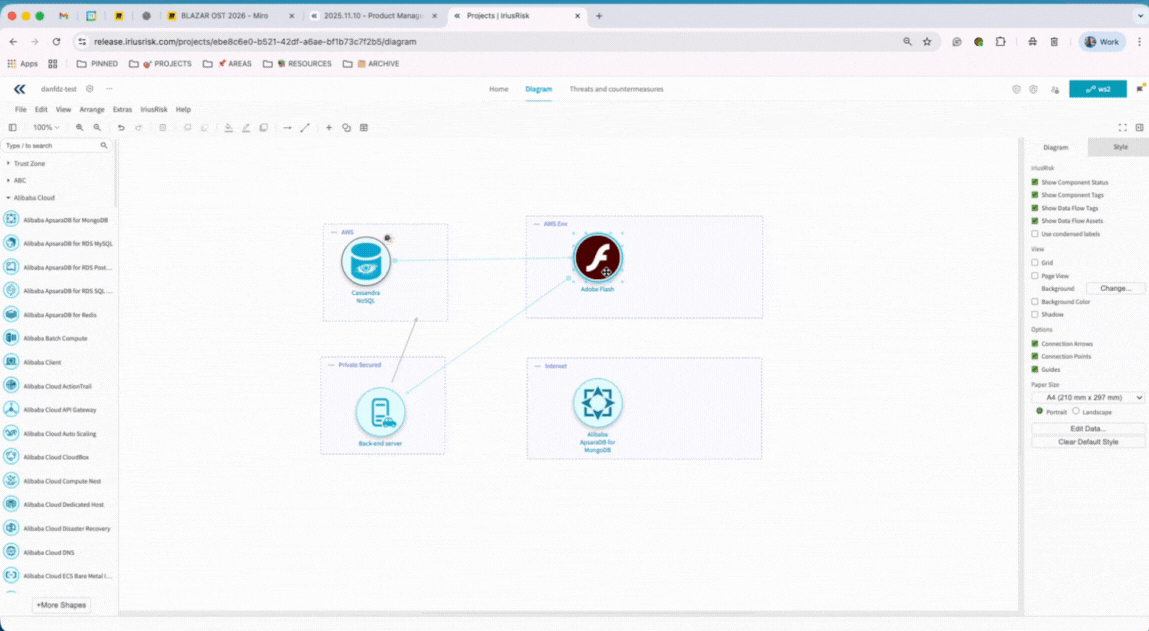
Navigate to the components and trust zones on the left hand side to choose what you need to build your diagram. Simply drag and drop them onto the canvas. We recommend starting with your trust zones to group the components together, and to provide a level of trust and risk for those zones. However, you can still proceed with a full threat model without trust zones. It can be added in at any time, and you are still able to update your threat model. If no trust zones are included, the default trust rating used will be zero.

You can enlarge the trust zones and move them around as you see fit. Next pick your components. You can expand the sections which are in alphabetical order, or use the search bar to find your ‘user’, ‘database’, ‘S3 bucket’ and many many more. New components are added in every product release.
After adding some components, you can include data flows between them by hovering over a component and once the arrow appears, click this and drag it to another component.

Data flows and components can be annotated for additional context. Bidirectional flows and the type of data being transferred can be selected such as credit card data or personal information.
Simply right click on the data flow line, the side model will show, where you can add your tags and the assets. Don’t forget to press 'Save' (top right button) so that these changes are reflected on your diagram.

Once these annotations have been made, you will see that the assets or tags are now visible on the data flow line:

For quick actions, a context menu is available when hovering over diagram components, providing easy access to the following actions: Replace, Respond questionnaire, Get details, and Create an Issue Tracker ticket.
Right click on a component to do similar actions such as adding tags by selecting ‘Component Details’. This allows you to add tags, description and other context for your component - if you have the appropriate permissions to create tags, see more under ‘Creating Tags’ section.

You can give even further context by right clicking a component and choosing ‘Component Questionnaire. For both options a model will appear on the right hand side. You can answer a variety of questions about your component. You will see how many questions are left to answer and you can skip those you feel are irrelevant to your use case.

Once you are happy with your diagram - you can always go back and edit it later, or invite others to do so - press the orange ‘Update Model’ button to generate the associated threats and countermeasures. You have built your fist diagram!
Once the model is synced, users see a new “Questionnaire” category under Alerts, which lists all components with unanswered questionnaires. From this list, click directly on any component to open and complete its questionnaire. This makes it easier to spot what is missing, reduces manual effort, and helps maintain a high level of accuracy throughout the threat modeling process.
Components with unanswered questionnaires will also be highlighted in the diagram itself, so you can easily navigate to those that require more context to be provided within the component questionnaire. See the small icon to the top right of this component.

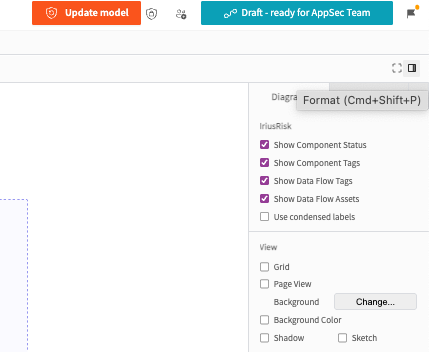
If you decide that you want to toggle this feature off, go to the Format button which can be seen on the right hand side of the diagram view (just below the update model and workflow state buttons), and untick 'Show Component Status'. This will remove the unanswered questionnaire notification from the diagram itself.
Component, Dataflow and Risk Pattern tagging is now only accessible to users who have the TAG_CREATE permission. This ensures that only the appropriate users are creating tags, avoiding issues with junk tags being created.
When you place a component that is not yet synced with your model, the hover message tells you exactly what to do: click Update model in the top right to include its threats and countermeasures and keep your diagram fully aligned with your model.

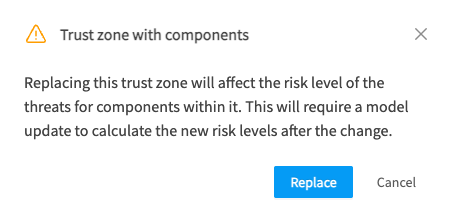
Let’s say you need to swap out a trust zone, as you have moved the components into a more secure environment such as a Private Cloud, instead of a Public Cloud. You can now do this with a few clicks.
Right click on the trust zone that you wish to swap out, and choose the ‘Replace Trust Zone’ option.

Choose your preferred trust zone on the slide in model, by scrolling or using the search bar. In this example we are using the search bar to find ‘Private Cloud’

Finally, the platform will ask you if you are sure you want to replace the trust zone ,as it will affect the risk rating of your threat model. Select ‘Replace’ when you are ready.
Whether you started from scratch, imported a diagram from an external resource, or used our AI to generate it for you, there may be times you want to refine the component(s).
Users can seamlessly replace components directly within the diagram using a right-click, eliminating the need to recreate connections and significantly streamlining the update process.

You can keep the slide-in model on the right hand side open, to continue replacing components elsewhere in the diagram. The search bar speeds this up significantly if you prefer to search over expanding component groupings.

Let's say you have certain components you don't need your whole organization to see. Whether it be relevant to a specific group of users, or perhaps you don't want to add confusion by having components visible that a certain group won't ever use. Come out of a Project if you are already in one, back to the main menu. Click on 'Objects' at the top and then 'Components'. Find the component you wish to restrict, the example below is for Client Side. You can either toggle the button to 'Yes' to have visibility to all, or toggle it to 'No', and choose the relevant Business Units you want to have visibility of this for. Below you can see some example groups that can be selected.

Click on the component you wish to duplicate, you will see the shortcuts menu above the component, select the icon that looks like a page in portrait format, you will see it asks if you want to Duplicate a clean component or with questionnaire answers. If you choose the former, it won’t have any questionnaire associated with it (you can still add later if you need to).
Go to the three ellipses on the top left again, here you will see the top option is to copy the project link. You can send this to team members to collaborate further.
